Ready to embark on your journey into the exciting world of digital photography? Whether you’re a complete beginner or have some basic knowledge, this comprehensive guide is here to help you navigate the ins and outs of this captivating art form. From understanding your camera settings to capturing stunning compositions, we’ll walk you through the essential techniques and tips you need to elevate your photographic skills. Get ready to dive into the world of digital photography with confidence and capture moments that will last a lifetime.

Understanding Digital Photography
What is Digital Photography?
Digital photography is the method of capturing and storing images using electronic sensors instead of traditional film. With the advancements in technology, digital cameras have become more accessible and affordable for everyone, making it the go-to choice for capturing precious moments and expressing creativity through photography. Unlike film cameras, digital cameras allow for instant review and sharing of photos, making it easier than ever to capture memorable moments and share them with friends and family.
Advantages of Digital Photography
Digital photography offers several advantages over traditional film photography. Firstly, digital cameras provide instant feedback, allowing you to review and delete unwanted photos right away. This feature ensures that you can capture the perfect shot with minimal effort and wasted film. Additionally, digital cameras offer greater flexibility in terms of post-processing. You can easily edit and enhance your photos using various software applications to bring out their full potential. Unlike film, you can also easily share your images online, creating a platform for showcasing your work and receiving feedback from others.
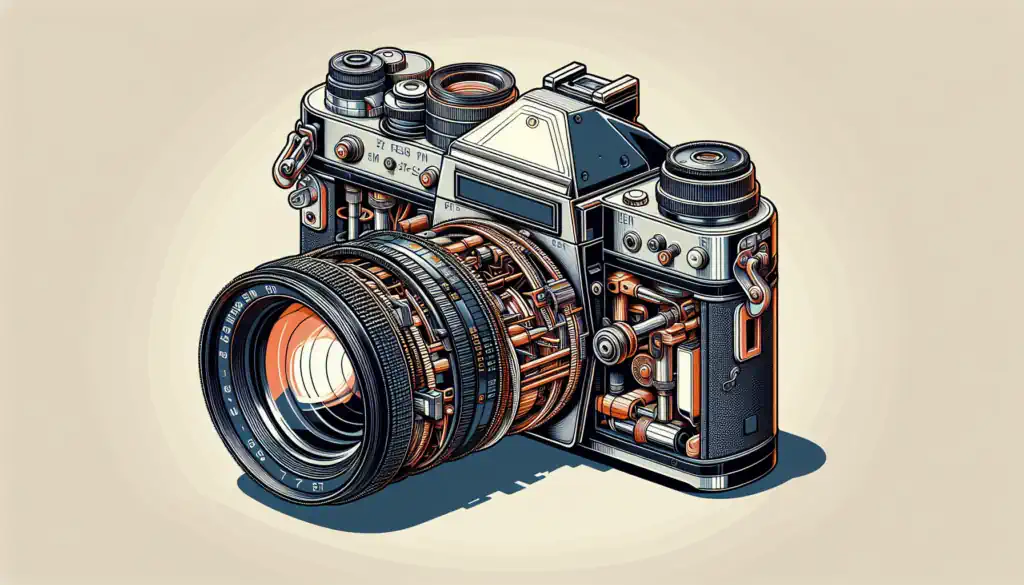
Components of a Digital Camera
To fully understand digital photography, it is essential to grasp the basic components of a digital camera. These components include the lens, image sensor, viewfinder, LCD screen, and various buttons and dials for adjusting settings. The lens gathers light, which then passes through the aperture and onto the image sensor. The image sensor converts the light into an electronic signal, which is then processed and saved as a digital image file. The viewfinder and LCD screen allow you to compose and preview your shots, while the buttons and dials give you control over various camera settings.
Choosing a Digital Camera
Types of Digital Cameras
There are several types of digital cameras available in the market today, each catering to different preferences and needs. Some popular types include compact cameras, also known as point-and-shoot cameras, which are portable and user-friendly. Mirrorless cameras offer interchangeable lenses and high-quality image sensors, making them a favorite among photography enthusiasts. DSLR cameras, on the other hand, provide the ultimate control and versatility, making them perfect for professional photographers. Consider your budget, shooting preferences, and level of expertise when choosing a digital camera.
Considerations for Choosing a Camera
When choosing a digital camera, consider factors such as camera resolution, sensor size, and the availability of manual controls. Higher resolution cameras produce sharper images, while larger sensor sizes allow for better low-light performance and depth of field control. Additionally, manual controls such as aperture priority, shutter priority, and manual mode give you greater control over exposure settings. Durability, battery life, and compatibility with accessories are also important factors to consider when selecting a digital camera.
Camera Features to Look for
When browsing through the vast array of digital cameras, it’s important to take note of certain features that can enhance your photography experience. Some desirable features include image stabilization, which helps reduce camera shake and produce sharper images, and Wi-Fi or Bluetooth connectivity, which allows for easy sharing and remote control of your camera. Other features to consider are weather sealing, which protects the camera from dust and moisture, and a tilting or rotating LCD screen, which enables shooting from unique angles or for vlogging purposes.
Essential Camera Settings
Resolution and Image Quality
Camera resolution refers to the number of pixels in an image and determines the level of detail captured. Higher resolution cameras produce larger file sizes and allow for greater flexibility when cropping and printing. Image quality, on the other hand, is determined by factors such as sensor size, lens quality, and image processing algorithms. It’s important to choose a camera that produces high-resolution images with excellent image quality to capture the best possible photographs.
ISO, Aperture, and Shutter Speed
ISO, aperture, and shutter speed are the three primary settings that control the exposure of your photographs. ISO determines the camera’s sensitivity to light, with lower ISO values providing cleaner images in well-lit conditions, while higher ISO values are ideal for low-light situations. Aperture refers to the size of the lens opening, affecting the depth of field, or how much of the image is in focus. Shutter speed, measured in fractions of a second, determines the length of time the camera’s shutter remains open, impacting motion blur. Understanding how these settings work together can help you achieve proper exposure and creative effects in your photographs.
White Balance and Color Settings
White balance is a setting that ensures accurate color representation in your photographs by neutralizing the color cast caused by different light sources. It is essential to adjust the white balance according to the lighting conditions, such as daylight, tungsten, or fluorescent lighting, to maintain the natural colors of your subjects. Additionally, many digital cameras offer creative color settings, allowing you to experiment with different tonalities and artistic effects.
Understanding Light
Natural Light vs. Artificial Light
Light plays a crucial role in photography, and understanding the difference between natural and artificial light is essential for capturing stunning images. Natural light, such as sunlight, provides a soft and warm illumination that varies throughout the day, creating different moods and highlights. Artificial light, on the other hand, includes any form of man-made lighting, such as fluorescent or tungsten bulbs, which can introduce different color temperatures and shadows. By understanding and utilizing both natural and artificial light sources, you can create dynamic and visually appealing photographs.
Direction and Intensity of Light
The direction and intensity of light greatly impact the overall look and feel of your photographs. Front lighting, where the light source is in front of your subject, creates even illumination with minimal shadows, suitable for portraits and detailed subjects. Backlighting, where the light source is behind your subject, produces silhouettes or halo effects, adding drama and depth to your images. Side lighting, coming from the side of your subject, creates dimension and texture, emphasizing the subject’s contours. Experimenting with different lighting angles and intensities can result in captivating and unique photographs.
Using Light to Set the Mood
Light is a powerful tool that can be used to convey emotions and set the mood in your photographs. Soft, diffused light creates a calm and peaceful atmosphere, suitable for intimate portraits or serene landscapes. On the other hand, harsh, direct light can convey a sense of drama and tension, perfect for capturing dynamic action or emphasizing textures. By being mindful of the lighting conditions and adjusting your camera settings accordingly, you can effectively utilize light to tell a story and evoke specific emotions in your viewers.
Framing and Composition
Rule of Thirds
The rule of thirds is a fundamental principle of composition that involves dividing the frame into a grid with nine equal sections, formed by two horizontal and vertical lines. The points where these lines intersect are known as power points. By placing key elements along these lines or at the power points, you create a visually balanced and engaging composition. This technique helps avoid placing your subject in the center of the frame and encourages more dynamic and aesthetically pleasing photographs.
Leading Lines
Leading lines are elements within the frame that guide the viewer’s attention towards the main subject or focal point of the photograph. These lines can be actual objects, such as roads or fences, or implied lines formed by patterns, shapes, or light. By positioning leading lines in your composition, you can create depth, movement, and a strong visual narrative. Experiment with different angles and perspectives to find leading lines that complement your subject and add interest to your photographs.
Framing and Backgrounds
Framing and backgrounds play a crucial role in directing attention to the main subject and creating aesthetically pleasing compositions. By framing your subject with objects or elements in the foreground, you add depth and context to your photograph. Backgrounds should be chosen carefully to avoid distractions or clutter that could detract from the main subject. Experiment with different angles and perspectives to find the most pleasing framing and backgrounds for your photographs.
Mastering Focus and Depth of Field
Selecting the Right Focus Mode
The focus mode on your camera determines how the camera locks onto and tracks focus as you capture your images. Single focus mode is ideal for still subjects, where the camera locks focus once and remains fixed until you capture the shot. Continuous focus mode, on the other hand, is suitable for moving subjects, as it continuously adjusts focus as the subject moves within the frame. Understanding the different focus modes available in your camera and selecting the appropriate mode for your subject can help you achieve sharp and well-focused photographs.
Depth of Field and Its Impact
Depth of field refers to the range of distance that appears acceptably sharp in a photograph. It is influenced by factors such as aperture, focal length, and subject distance. A shallow depth of field, achieved by using a wide aperture (small f-number), blurs the background and foreground, allowing your subject to stand out in the image. A deep depth of field, achieved by using a narrow aperture (large f-number), ensures that both the subject and background are in focus. Understanding depth of field and how to control it can help you create different visual effects and draw attention to specific areas of your photograph.
Focusing Techniques
Mastering focusing techniques is crucial for capturing sharp and well-defined photographs. One common technique is using the autofocus (AF) system built into your camera, which automatically adjusts focus based on sensor readings. By selecting the appropriate AF mode, such as single-point AF or zone AF, you can ensure accurate focus on your subject. Additionally, manual focus can be a powerful tool, especially in situations with low light or subjects that are difficult for the autofocus system to capture. Experiment with different focusing techniques and practice regularly to improve your ability to achieve precise focus.
Exploring Different Shooting Modes
Auto Mode for Beginners
Auto mode is perfect for beginners or those who want to quickly capture moments without having to adjust camera settings manually. In auto mode, the camera analyzes the scene and selects the optimal settings for exposure, focus, and flash if needed. While auto mode provides convenience, it limits your control over creative aspects of photography. As you gain more experience and confidence, consider exploring other shooting modes to have more control over your photographs.
Program Mode for More Control
Program mode is a semi-automatic shooting mode that provides a balance between convenience and control. In program mode, the camera selects the optimal exposure settings like aperture and shutter speed for you, while still allowing you to adjust other settings manually. This mode is ideal for photographers who want more flexibility without the complexity of fully manual modes. To take further creative control, consider exploring aperture priority and shutter priority modes.
Aperture Priority and Shutter Priority Modes
Aperture priority and shutter priority modes are fully manual shooting modes that give you complete control over exposure settings, while still automating other aspects of photography. In aperture priority (A or Av) mode, you select the desired aperture, and the camera calculates the appropriate shutter speed for a proper exposure. This mode is useful when you want to control the depth of field in your photographs. In shutter priority (S or Tv) mode, you choose the shutter speed, and the camera adjusts the aperture for proper exposure. This mode is ideal for capturing motion by controlling the amount of time the camera’s shutter remains open. By utilizing these modes, you can unleash your creativity and achieve the desired effects in your photographs.
Working with Lenses
Types of Lenses
Different lenses serve different purposes in photography, giving you the flexibility to capture a wide range of subjects and perspectives. Wide-angle lenses, typically with focal lengths less than 35mm, are excellent for landscapes and architectural photography, as they capture a wide field of view and create a sense of depth. Standard lenses, with focal lengths between 35mm and 85mm, offer a natural perspective similar to what the human eye sees, making them versatile for various genres of photography. Telephoto lenses, with focal lengths exceeding 85mm, are ideal for wildlife, sports, and portrait photography, as they allow you to zoom in on distant subjects and achieve a shallow depth of field.
Zoom vs. Prime Lenses
Zoom lenses offer variable focal lengths, allowing you to change the focal length without switching lenses. They provide versatility and convenience, making them popular among hobbyist photographers. Prime lenses, on the other hand, have a fixed focal length and offer superior image quality and a wider maximum aperture compared to zoom lenses. They are often chosen by professionals and enthusiasts who prioritize image quality and creative control. Consider your shooting preferences and budget when deciding between zoom and prime lenses.
Choosing the Right Lens for Your Needs
When selecting a lens for your camera, consider factors such as focal length, aperture range, and lens compatibility. Focal length determines the perspective and magnification of your images, so choose a lens that suits your preferred style of photography. Aperture range, or the ability to control the amount of light entering the lens, is important for achieving a shallow depth of field or capturing images in low-light conditions. Additionally, ensure that the lens is compatible with your camera’s mount. Research and reading reviews can help you find lenses that suit your needs and budget.
Image File Formats
JPEG, RAW, and Other File Formats
Digital cameras offer various file formats for saving your photographs, including JPEG, RAW, and others. JPEG (Joint Photographic Experts Group) is the most common image file format and is widely supported by most devices and software applications. It offers a compressed file size, suitable for sharing and online use. RAW, on the other hand, is the unprocessed data captured by the camera’s sensor, providing the highest image quality and flexibility for post-processing. Other file formats, such as TIFF or PNG, offer different advantages and are often used in specific contexts or workflows.
Pros and Cons of Each Format
JPEG files are smaller in size and can be easily shared or printed without significant quality loss. However, JPEG is a lossy compression format, meaning that some image data is discarded during compression, potentially resulting in lower image quality. RAW files, on the other hand, preserve all the data captured by the camera’s sensor, offering greater dynamic range, color depth, and the ability to adjust various settings during post-processing. However, RAW files are larger in size and require specialized software for editing and conversion to other file formats. Understanding the pros and cons of each file format can help you choose the most suitable format for your workflow and intended use.
Choosing the Right Format for Your Workflow
Choosing the right image file format depends on your intended use, storage capacity, and post-processing workflow. If you prioritize convenience and quick sharing, JPEG may be the best choice. However, if you value maximum control over your images and plan to perform extensive post-processing, RAW is the preferred format. Consider the storage capacity and processing capabilities of your computer before deciding on a file format, as RAW files can quickly fill up memory cards and require more powerful hardware for editing. Additionally, keep in mind that you can always shoot in both JPEG and RAW formats simultaneously to have the best of both worlds.
Image Editing and Post-Processing
Introduction to Image Editing Software
Image editing software allows you to enhance and transform your photographs by adjusting various aspects such as exposure, colors, and composition. Popular image editing software includes Adobe Photoshop, Lightroom, and GIMP, among others. These software applications provide a wide range of tools and features to refine your images and bring out their full potential. Whether you’re a beginner or an experienced photographer, learning to use image editing software is an essential skill to take your digital photography to the next level.
Basic Editing Techniques
Basic editing techniques involve adjusting common aspects of your photographs to improve their overall quality. This includes adjusting exposure to balance brightness and darkness, correcting white balance to ensure accurate colors, and enhancing contrast and clarity to make your images pop. Basic editing also involves cropping and straightening to remove distractions and align the composition. Learning these fundamental techniques can significantly enhance the impact of your photographs and bring your creative vision to life.
Enhancing Colors and Adjusting Exposure
One of the most powerful aspects of image editing software is the ability to enhance colors and adjust exposure. With color adjustment tools, you can fine-tune the tones, saturation, and vibrancy of different colors to create a specific mood or emphasize certain elements in your photographs. Exposure adjustment tools allow you to correct underexposed or overexposed images and fine-tune the overall brightness and contrast. By mastering these color and exposure adjustment techniques, you can transform ordinary photographs into stunning and visually captivating works of art.
In conclusion, digital photography offers countless possibilities for capturing and expressing your creative vision. By understanding the various components of a digital camera, choosing the right camera and lenses, and mastering essential camera settings, you can take full control of your photography. Additionally, understanding light, composition techniques, focusing, and different shooting modes will further enhance your ability to capture compelling and visually pleasing images. Finally, understanding image file formats and learning image editing and post-processing techniques will enable you to refine and enhance your photographs to their full potential. With practice, experimentation, and a passion for photography, you can embark on an incredible journey of self-expression and storytelling through digital photography.